Signup to Free DeployHQ and activate your account.
DeployHQ’s free plan allows you to deploy a single project up to 10 times a day. Or you may go for their basic plan as per your need.
When you are done with account creation process the next process is the setup. Which I’m going to discuss in detail in coming sections.
Setup the deployment server
Inside “Servers & Groups” you need to
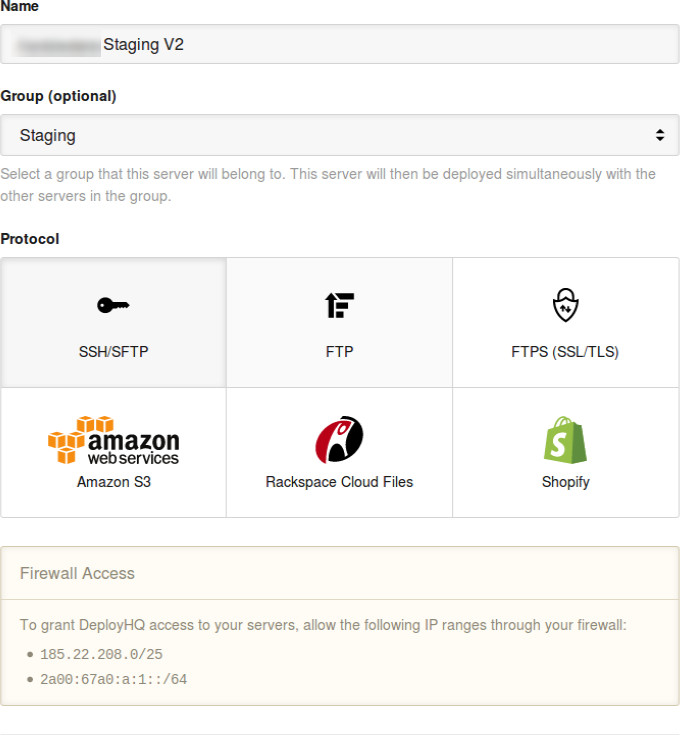
- Enter “Name” like “Staging server”
- Enter group for instance like “staging”
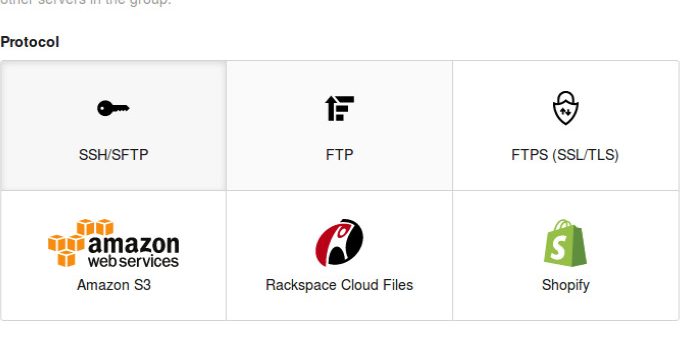
- Now time to choose protocol, choose your required protocol from their my choice is SSH/SFTP for this example
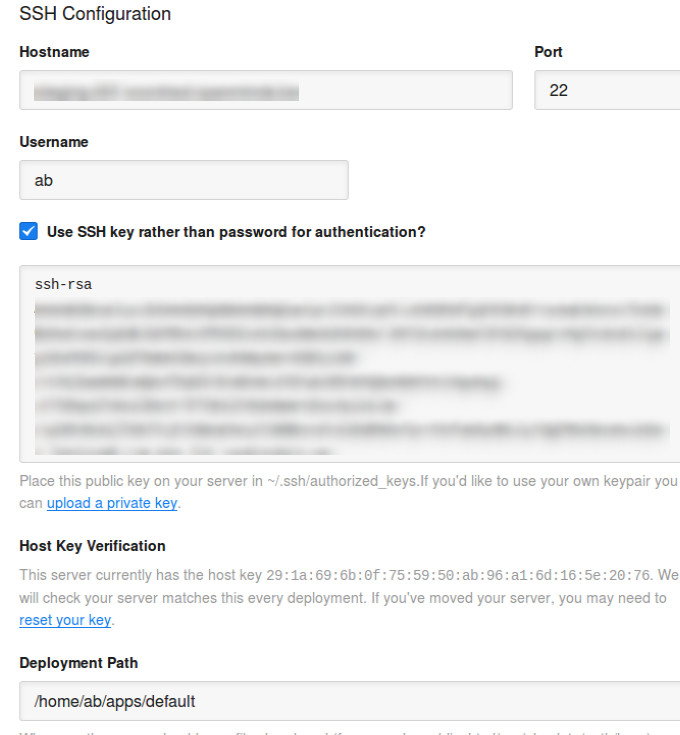
- Fill in your actual server’s SSH details like host, username, and then check “Use SSH key rather than password for authentication”.
- After clicking that check box copy the generated public key into your server’s
~/.ssh/authorized_keysfile. I recommend to paste it at the end outside of all comments to not disturb any automated generated keys, as they are normally placed inside some block of comments. Ensure that your save that file properly and after closing it do verify by opening it again that it is there. - Now its time to give your server’s Deployment Path, this is the path were the code of the repo needs to be pushed. For instance normally it can look something like /var/www/html/example.com/public_html or any other path.
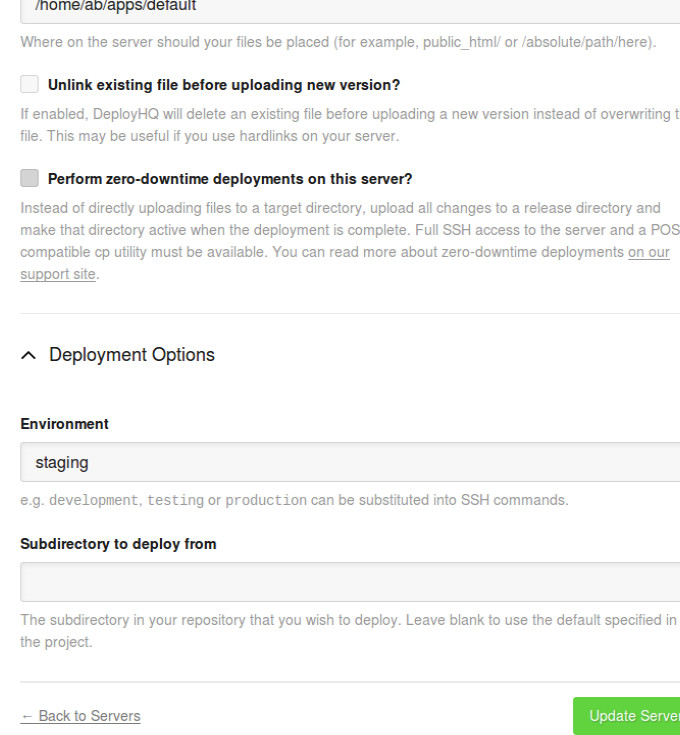
- As per your need Check or keep unchecked the “Unlink existing file before uploading new version?”. I’ll keep it unchecked.
- I will also leave unchecked “Perform zero-downtime deployments on this server?”. The reason behind is that normally images are not part of repo and if you think if the directory of your code changes then it’ll still remain working based on code for instance if you are already using CDN for images then you are good to go with this option, otherwise if you are not sure I won’t recommend to go with this option for now until you become dam sure.
- Now in Deployments Options inside Environment you can just fill “Staging”.
- Now save the information and the information the we saved so far will look like below
Config Files
Normally files like .env are separate for development, staging and production servers. So this is place to create that file so that it never gets missing my deployment process. For me how it looks

Now save it and lets skip the Excluded Files section for now as I don’t have anything to exclude but if you have something you can go ahead with that 🙂
Notification
In this section you can configure some notifications, I’ve configured slack notifications for me you can go with your choice. I can have some other post on that but normally you’ll find many useful posts on Internet to do that and in-case anything goes wrong DeployHQ live chat is much helpful and responsive you’ll be able to solve any of you issue within minutes.
SSH Commands
This section is quite important and it should be understood well too. Here you can fill out any commands that your want to execute Before Changes, Before Release Link (Only applicable for zero-down time) and After Changes. Lets now how these features can benefit us, for instance your application makes use composer update/install then this can be a place to perform that thing. And the right place to do that would be “After changes”, that’s what I’m using in my application too.
For build operations like
composer install or updatewe can use Build Pipeline as well but my experience with so far wasn’t good. As with normal deployment it takes just one minute, for the first time it may take more but afterwards that takes one minute. Whereas in case of Build Pipeline it takes around 20 minutes every-time.
So lets move ahead and fill out SSH Commands for “After changes” use case. Fill out description and give it some name like “Composer operations”. Now fill Command section and here are my list of commands
cd ~/apps/default; # Ensuring the commands will be running in my required directory
php ~/composer.phar self-update;
php ~/composer.phar install;
php ~/composer.phar update;
rsync -avz . ab@staging-002:~/apps/default; # Moving code from one staging server to the other, we are using load balance so code is placed on two servers
This is pretty much it for this section for other options you can go with default options, I’ve also checked “Stop the deployment if the command fails” and “Run this command on all current and future servers”.
Now save and move to the next section.
Automatic Deployments
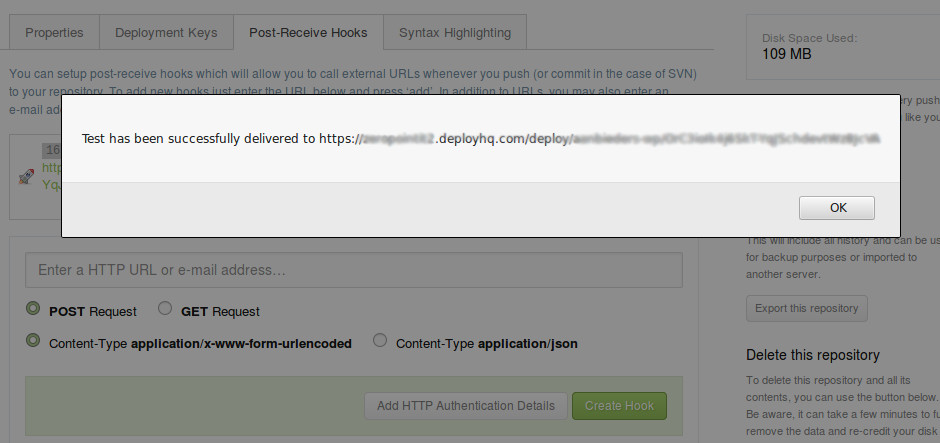
This is the section that provide you a webhook URL so your code can be automatically pushed to the servers when it is pushed to Codebase or Github. For me it was Codebase and to associate this web hook there I went to Repo Settings >> Post-Receive Hooks >> Then pasted the Webhook URL and created the hook. Then I clicked on Test to verify it it went well and there was the success message. Which you can see from the screenshot below.
This is it we’ve successfully configured the automatic deployments. Now you can click on Deploy Project button to see if it went well. Please do utilize their “Chat with our team” service if you find anything difficult.

